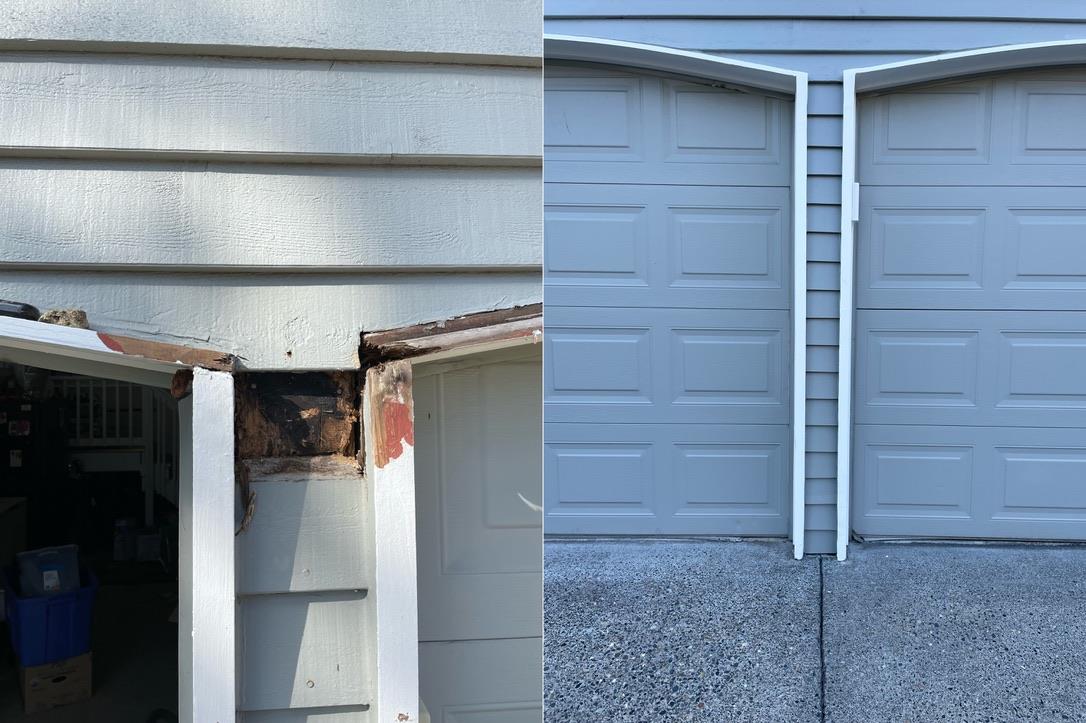
Dry rot can wreak havoc on exterior features of your home, and garage door siding and trim are no exception. Recently, I tackled a project to repair dry rot that had penetrated all the way through the sheathing. Here’s a step-by step guide on how I restored the damaged areas to their former glory.
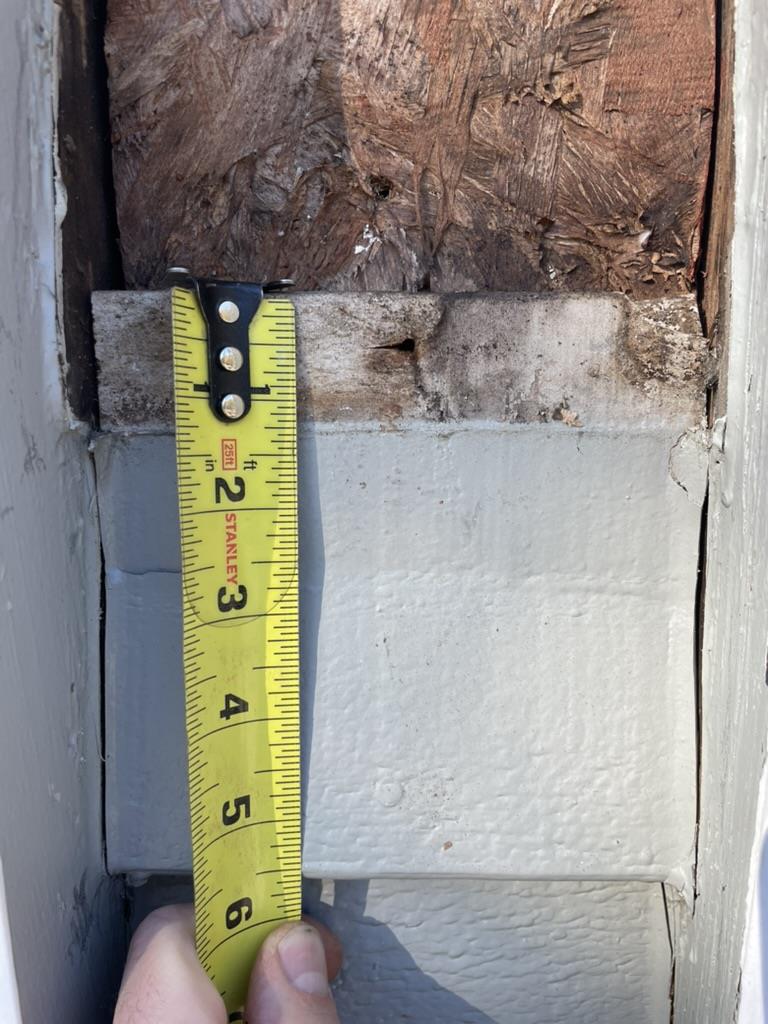
Step 1: Assess the Extent of the Rot
Dry rot can spread quickly, so it’s essential to determine how much material is affected. In this
case, the rot had compromised the siding, trim, and sheathing. A thorough inspection ensured
that I removed all the damaged material to prevent future issues.
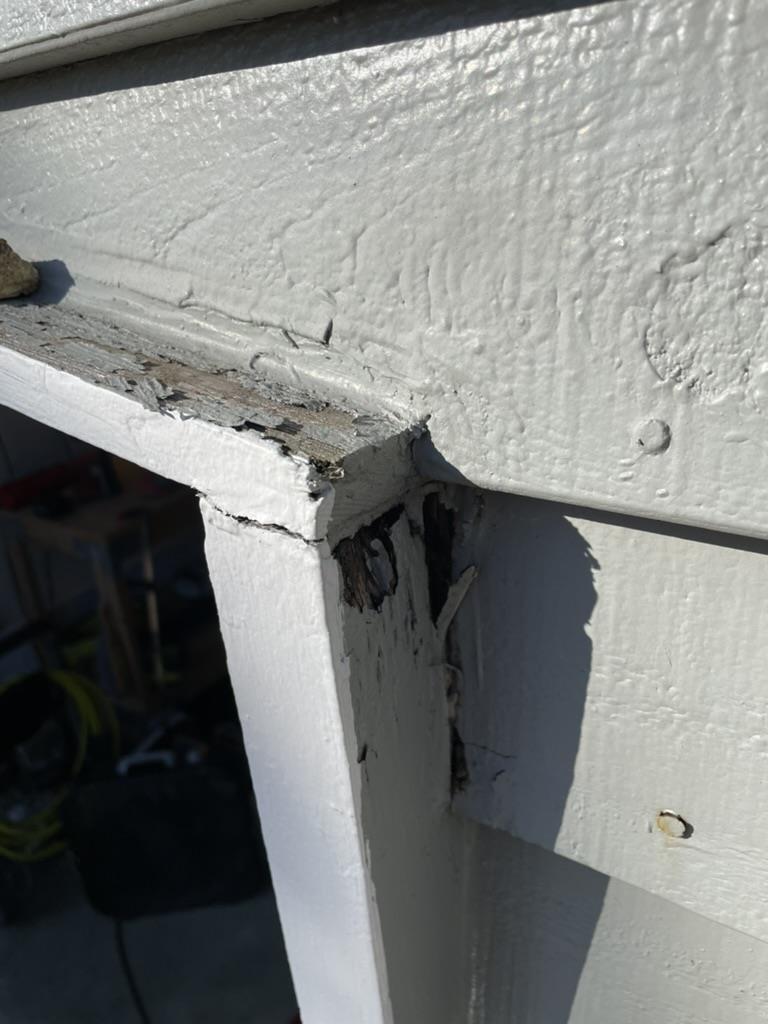
In this case, the peeling paint was the first sign something was wrong underneath. Paint will start to peel if the underlying wood starts to rot.
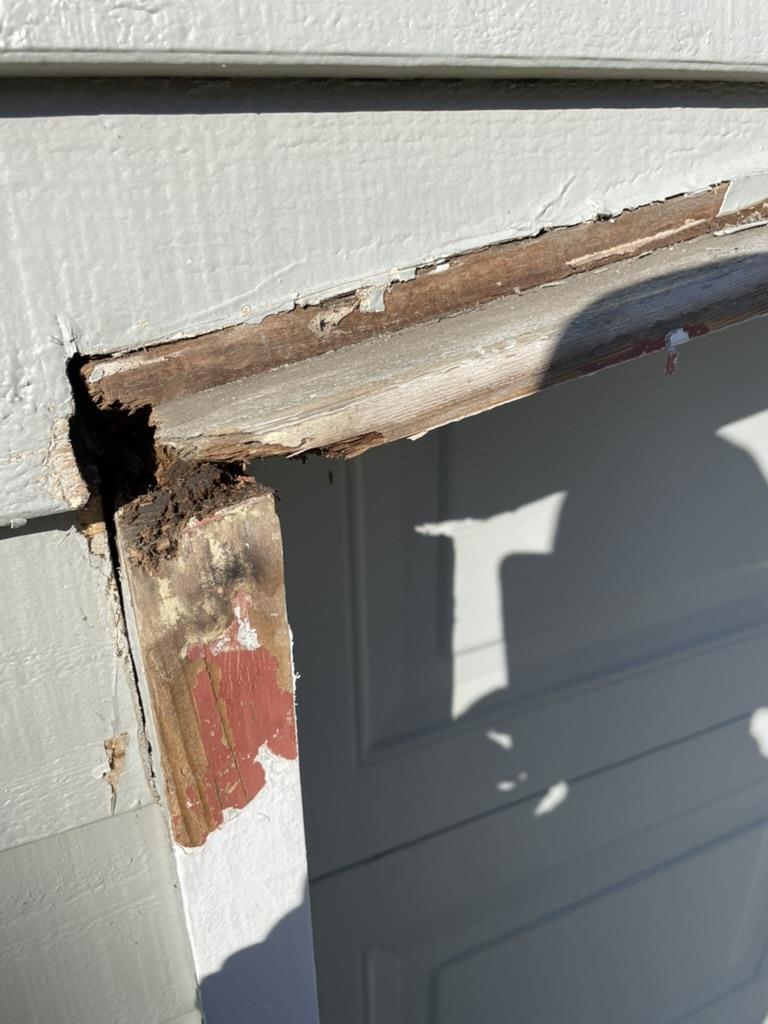
Step 2: Remove the Rotted Material
Using a combination of tools, including a pry bar, saw, and chisel, I carefully removed all the rotted siding, trim, and sheathing. This step required precision to avoid damaging the surrounding areas. Once the rot was cleared, I inspected the underlying framing to ensure it was still solid.
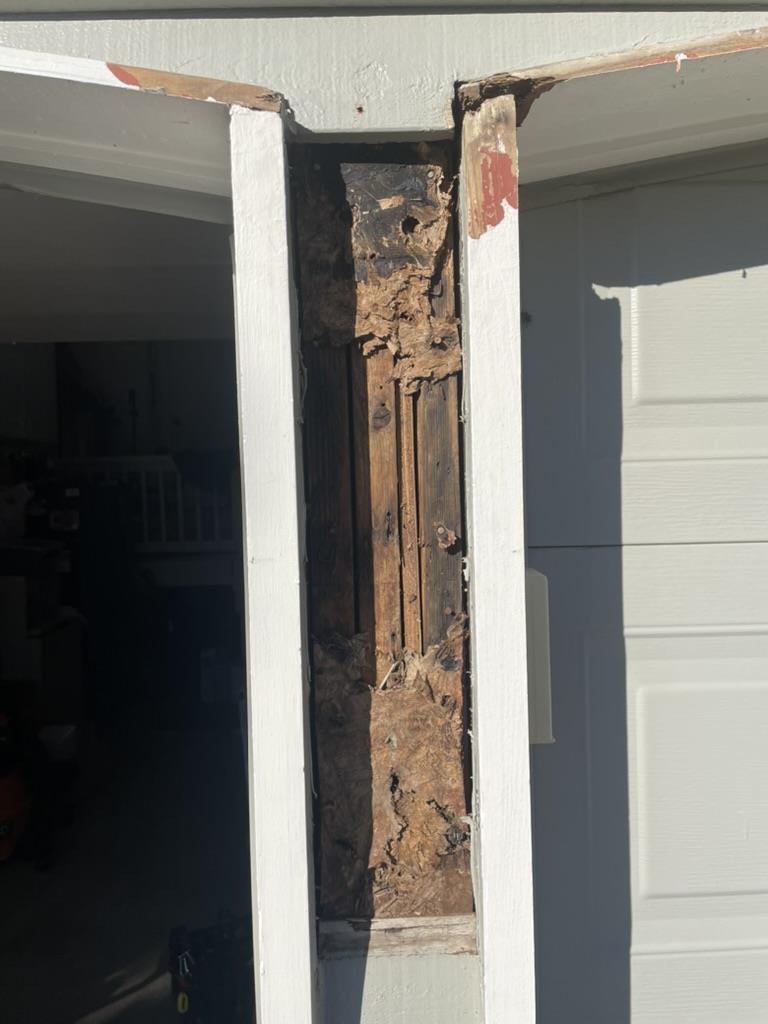
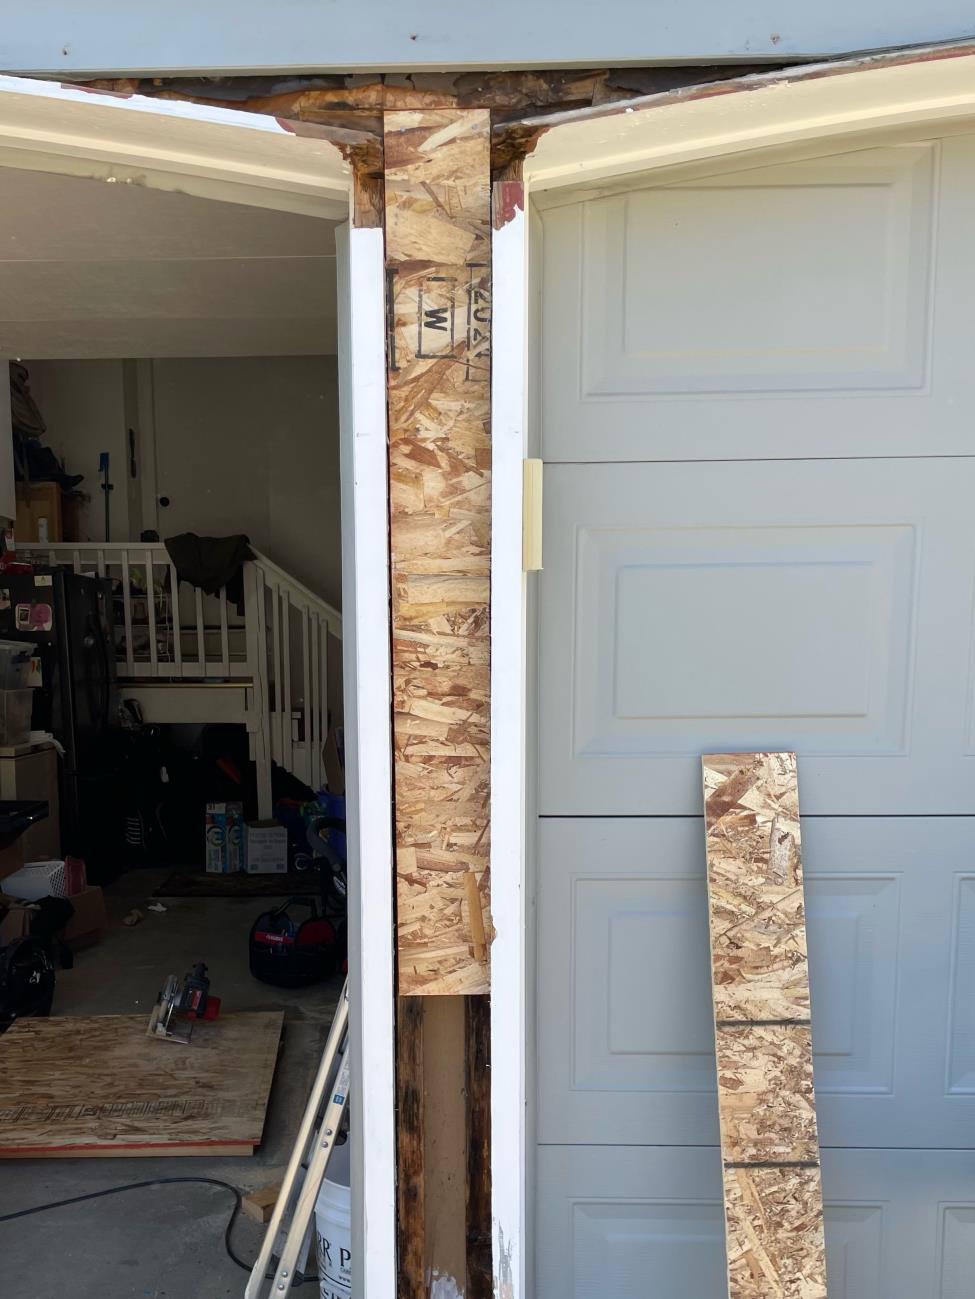
Step 3: Replace the Sheathing
I installed new sheathing, ensuring it was securely fastened and properly aligned. Using materials rated for exterior use is critical for durability and longevity.
Step 4: Install New Siding and Trim
For the siding and trim, I measured and cut pieces to match the original dimensions. Some of the trim boards had unique shapes that required me to use special wood putty to mold and replicate the original design. This step was particularly challenging but ultimately rewarding when the new trim blended seamlessly with the existing design.

Step 5: Caulk All Joints
To protect against moisture and ensure a tight seal, I applied exterior-grade caulk to all joints and
seams. This step is crucial for preventing water infiltration, which can lead to future rot.
Step 6: Prime and Paint
As with any exterior project, preparation is key. I primed the new materials to protect against moisture and followed with a fresh coat of durable exterior paint. Matching the paint color to the existing garage door ensured a cohesive and polished look.
The Result
The repaired garage door siding and trim now look as good as new. The combination of new
materials, careful caulking, and a fresh paint job ensures the area is both functional and visually
appealing for years to come.
Key Takeaways
- Addressing dry rot promptly prevents further damage and costly repairs.
- Using high-quality materials, including exterior-grade wood putty and paint, ensures a durable repair.
- Attention to detail, especially when replicating intricate trim designs, makes a big difference in the final result.
If you’re dealing with dry rot on your garage door or other areas of your home, tackling the issue
head-on can save you time and money in the long run. Need advice or assistance? I’m always
here to help!